

Create your own beautiful dried flowers that will keep their colour and last…
I don’t think that there is anything more stunning than a collection of naturally dried flowers. They are vibrant and textural and incredibly unique. They fill empty spaces with wonder and appreciation for the natural world that surrounds us.
And the scent – oh that scent - believe me it is something truly intoxicating! It is different than the scent of fresh flowers; it is rich and deep and more complex. Strawflowers and most other daisies keep this scent for a very long time, even years after they are dried. Most days I am used to it – but if we are away for a couple of nights and then return – I am once again struck by the amazing, heady fragrance.
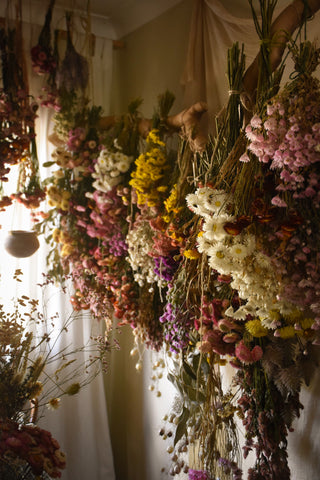
Dried flower collections are functional as well as beautiful. I love to look at my flowers that dangle from branches and hooks throughout my home and dream up exciting flower combinations for bouquets, wreaths, and other projects. Yes, you can store your dried flowers in boxes, but I prefer to keep most of them somewhere visible – front and centre - to ignite my imagination at any moment, to share the beauty with my family and all who visit my home.
I also like to keep my flowers where I can see them because I love to touch them. I can’t help but want to hear that crispy crunch and feel the rough textures that can only be appreciated when flowers are dried naturally - hardened seed heads, feathery soft grasses, papery petals and the silky soft middles of daisies - it is all part of the delightful process.
And if you are a gardener like me, you will view your flowers as treasures from your hard work outdoors. When I see my flowers hanging up in my home, I am reminded of the joy that I experienced while growing them; and I feel motivated to go out there and grow more, find more seeds, dig deeper, and continue the cycle season after season.
This traditional method of drying flowers that I am sharing with you is a simple, ancient craft that produces the most spectacular, long-lasting results. Drying flowers by hand takes time, as do all wonderful handmade things in this world, but I find the process meditative and enjoyable, and I hope that you will agree.
Follow these simple steps to create long lasting beauty and colour without the use of any nasty chemicals, bleaches, dyes, or preservatives.

GETTING STARTED
You will need:
- Flowers. As fresh as possible! The fresher the flowers – the better your dried flowers will be. Perhaps you are growing some in your garden, which is ideal, otherwise look for flowers that have been grown as near to you as possible. Your local farmers market is a good place to start.
- A place to hang up your flowers – this could be along a coat rack, a line of twine against a wall, a dried flower hanger, ceiling or wall hook. Get creative and suspend something from the ceiling like wire mesh, an old ladder, or a foraged tree branch. Don’t be afraid to punch some holes in your walls, it is easy to patch them up with some puddy if you need to. You can find my favourite ceiling hooks here - https://www.bunnings.com.au/ramset-spring-toggle-with-white-hook-2-pack_p2265664
- Twine or string for hanging
- Rubber bands
- Sharp scissors or secateurs
- Buckets of cold water
STEP 1 – CHOOSING
Creating dried flowers that will keep their colour and last depends greatly on choosing the right flowers in the first place. Here is a brief list of the best flowers for drying that will retain their vibrant colour for months if not years:
FLOWERS
- Strawflowers
- Paper Daisies {rhodanthe}
- Billy Buttons
- Mulla Mulla
- Amaranth
- Celosia
- Xeranthemum
- Gomphrena
- Rice Flower {ozothamnus}
- Larkspur
- Yarrow
- Russian Statice
- Traditional Statice
- Lavender
- Rudbeckia
- Feverfew
- Zinnias
SEED PODS
- Scabiosa
- Poppy
- Nigella {Love-in-a-mist}
- Honesty {Lunaria}
- Cress
GRASSES
- Quaking Grass
- Bunny Tails
- Oat
- Millet
- Kangaroo Grass
In addition to choosing the right varieties – you must choose flowers that are fresh and locally grown. Stay away from stems that look brown, slimy, smelly or mouldy – this indicates that the flowers are old and they should be avoided.
STEP 2 - CONDITIONING
Whether I am cutting from the garden or buying from local flower farms, I always condition my flowers. This is done by trimming the ends of the flowers and submerging them in a bucket of deep cold water for at least a few hours. The freshly cut stems will drink up the water and you will notice that the flowers will perk up, their stems will plump up – and they will just look like they are in wonderful condition – this is when flowers should be hung up to dry. The water in the stems will push down into the flower and help them keep their shape and strength.
STEP 3 – PREPARING
It is important to take your time preparing your flowers before you hang them. Carefully strip or cut off most of the foliage or side stems. Gather short stems in a separate bunch. Removing all of that greenery will increase air flow and reduce moisture around your flowers. This will greatly reduce the chance of mould – mould is the great enemy of dried flowers and something that we always need to keep at bay.
Bunch your flowers together in small bunches, again so that there is plenty of air flow. Tie a rubber band around the stems, so that when the stems dry and shrink, the band will tighten on its own and keep them together.
You can also stagger your flowers in a bunch so that the flower heads hang and different lengths, again increasing air flow. Remember that they will dry in the same shape that you hang them in – so try not to squish the flower heads together too much.
Tie a length of twine around the rubber band for hanging.

STEP 4 – HANGING
Hang up your flowers with the length of twine, and take care to position the stems so that the stems are hanging down in their natural position, as this is the shape they will dry in. I hang lots of flowers close together - but take care if you do this, checking for air flow.
The most common question I get about hanging flowers is in regards to light. Yes, over time – more than six months – flowers that are hung in direct, harsh sunlight will fade and become brittle. But for the most part, some light, especially morning light, is not a problem. I actually prefer the eastern light in my studio to hit my flowers, as I believe it helps to keep them dry and mould-free.
I know I keep saying this - but air flow is the most important factor to consider when drying your flowers. They simply must stay dry!
Luckily my home is on top of a hill and raised high up off the ground, and we get the strong sweeping breezes in from the western mountains. I have rarely ever seen mould in our house, not even much in the bathrooms, and so this is just luck that we have a good house for drying.
I have a ceiling fan in the studio, and if there is a mass of fresh material that I have just hung up – I will turn it on – or if the weather has been really rainy and damp, I may also turn it on. In the warmer months I usually have windows open throughout the house, keeping good air flow.
If you live in a low-lying or damp area, you may need to consider using a dehumidifier for drying large amounts of flowers.
STEP 5 - PATIENCE
It only takes a couple of weeks, more or less. For fast results, hanging flowers up against a window with morning light, and using a fan, will speed up the process. A warm room, such as an attic or shed, may help. My flowers take an average of 2-3 weeks to fully dry out.
Check on your flowers regularly. Check for mould – unfortunately if you spot some – chuck it in the compost straight away. Mould can spread and you don’t want it to migrate to your other flowers. I also keep an eye out for caterpillars that might be hiding in flower heads - they are sent to the compost as well.
If you have chosen the right varieties, the colour will stay all on its own… Naturally!
There is no need for any dyes, bleaches, chemicals or sprays - enjoying the beauty of flowers in our homes should not cost the earth - and unfortunately, flowers that are chemically treated, dyed, and preserved will all eventually end up in landfill.
By following these simple steps, you will be able to enjoy the dazzling colour and longevity of real dried flowers for years. I really do believe that - all natural - is the best way to dry. The results are absolutely stunning, and if and when your dried flowers do come to their end, you can simply add them to your home compost – and return them to the earth from which they came.
For ideas and inspiration - please enjoy browsing my collection of naturally dried flowers here. All have been carefully prepared and dried by hand in my home studio – in the exact method that I have described here. While this does take a considerable amount of time and effort, the results are certainly worth it.
I hope this has been helpful. Thank you so much for being here.
With love and gratitude,
Elizabeth xx