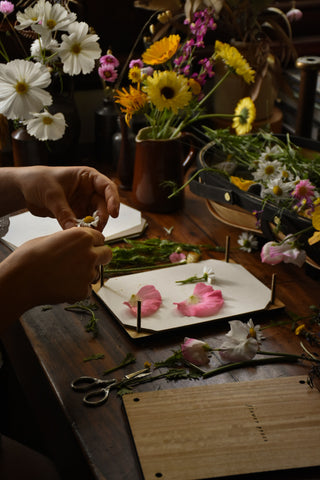
When I think about flower pressing, the first thing that comes to mind are special memories from my childhood. I think about being very little and collecting pretty maple leaves in autumn, pressing them, and making bookmarks for my parents. And I think of the old book that my mom kept, with rose petals tucked inside of it, kept from her wedding day. I think about summertime, having a picnic in our backyard and sifting through patches of clover, looking for the lucky four, five, or six leaved stems to pick and press… to savour a piece of those long holiday afternoons and keep that good luck close by.
The wonderful thing about this craft, is the simplicity of it. Flower pressing is an easy and beautiful way to preserve pieces of nature naturally, with nothing more than paper, weight, and a bit of patience. And, like taking a photograph, it is a way of cherishing a special place or moment in life, to keep and look back on. If you tend to tuck a petal or clover into a book as often as I do, you’ll know the joy of rediscovering the forgotten treasures months, or years, down the track, bringing back memories of the time and place that they were collected.

GETTING STARTED
My favourite thing about pressing is that you can use a myriad of materials… Do not feel limited to flowers. Think leaves, little clusters of buds, tiny branching stems, ferns, grasses, whole small plants, roots, seed heads and herbs… You most definitely have something to press just outside your door right now.
- Pick botanicals in the morning when they are fresh and dry and be ready to press immediately. If you wait until plants are wilted, they may not press well.
- Choose flowers and plants that are fairly thin so that they can fully dehydrate when pressed. Something large and thick like a dahlia is unlikely to work well.
- If you choose a flower like a poppy or nigella, try pinching out the fleshy bit in the middle of the bloom before pressing.
- Flowers can be pressed flat or on their side. Squish a flower head between your thumb and forefinger a bit {to get it in a side-position} just before pressing.
- Using a book: Lay your botanicals in a single layer, between two sheets of paper, inside a large book. Carefully close the book and add an additional few books on top of that one if additional weight is needed.
- Using my Flower Press: Assemble your press by twisting the bolts up through the bottom board of the press and tighten. Once you twist them in, they will stay in place as you add layers of thick card, paper and flowers. Add the top layer of the press, washers, and wingnuts and twist them down. Take care not to over-tighten.
Your pressings will be ready in just a couple of weeks. They will likely still be green at this stage, and will fade as they age. Now it's time to get creative… decorate cakes, tape pressings into journals, create your own garden herbarium, festoon your walls, make gorgeous little gift cards… bookmarks… the possibilities are endless. A herbarium is a collection of dried, pressed plants, mounted onto paper alongside written information about the specimens. Herbaria make it possible to study plants that are collected in the field, or from far away places. Especially before the time of photography, it was a vital resource for the study of plants and flowers.

TOP TIPS
- Look for ferny foliage {cosmos, California poppy} or pretty branching stems… look for things that will have a nice silhouette.
- It is always a good idea to use paper when pressing flowers in a press or book; avoid any wax paper or cling wraps, as that will hinder the evaporation process.
- As with all naturally dried flowers, pressings will fade over time, especially if they are exposed to light. If you create artworks with your pressed flowers, you may want to keep them away from direct sunlight.
- Use a Flower Press with smooth paper and card. You’ll want to avoid corrugated cardboard because the ripples in the cardboard will transfer onto your flowers.
- Keep experimenting. You never really know how something will turn out until you try. I have recently started pressing nasturtiums, even though they are quite a wet, squishy flower, they have turned out beautiful.
The reason I love pressing flowers so much is because it is another beautiful way to dry flowers naturally. That’s what’s happening when flowers are in a press or a book… they are slowly dehydrating so that the moisture leaves the plant, while shape and colour is preserved. Flowers can then be kept for many years and used in creative projects, but as they are natural and untreated, they can be added to your home compost. For me, as a mother to two little ones, I find this particularly advantageous when using pressed flowers for craft projects with the kids. Used alongside biodegradable glues or paper mache, there are all sorts of creations that we can make, but all can ultimately be home composted when their time is over.

So, what will you create?
Find beautiful, useful tools and materials in the Tools collection to start pressing and creating with your own flowers at home. My offerings include two different flower press designs, the Flower Press and Botanical Press. I also have lovely, handmade Herbarium Paper available, for creating wonderful pressed flower art.
Thank you so much for being here.
With love,
Elizabeth xx


